Session Reporting
Create your first session
Now that you've got Embrace linked and know how to login to the Embrace Dashboard, it's time to collect your first session.
Embrace always uploads sessions on subsequent launches. This means the general process we're going to follow to collect our first session is:
- Import the Embrace module
- Add a start call to the Embrace SDK
- End the Startup Moment
- Build and run our application
- Verify Embrace started via the logs
- Trigger a session upload
- Close, or send the application to the background
- Launch the application to the foreground
- Verify that our first session was uploaded to Embrace by checking the Dashboard
Import Embrace
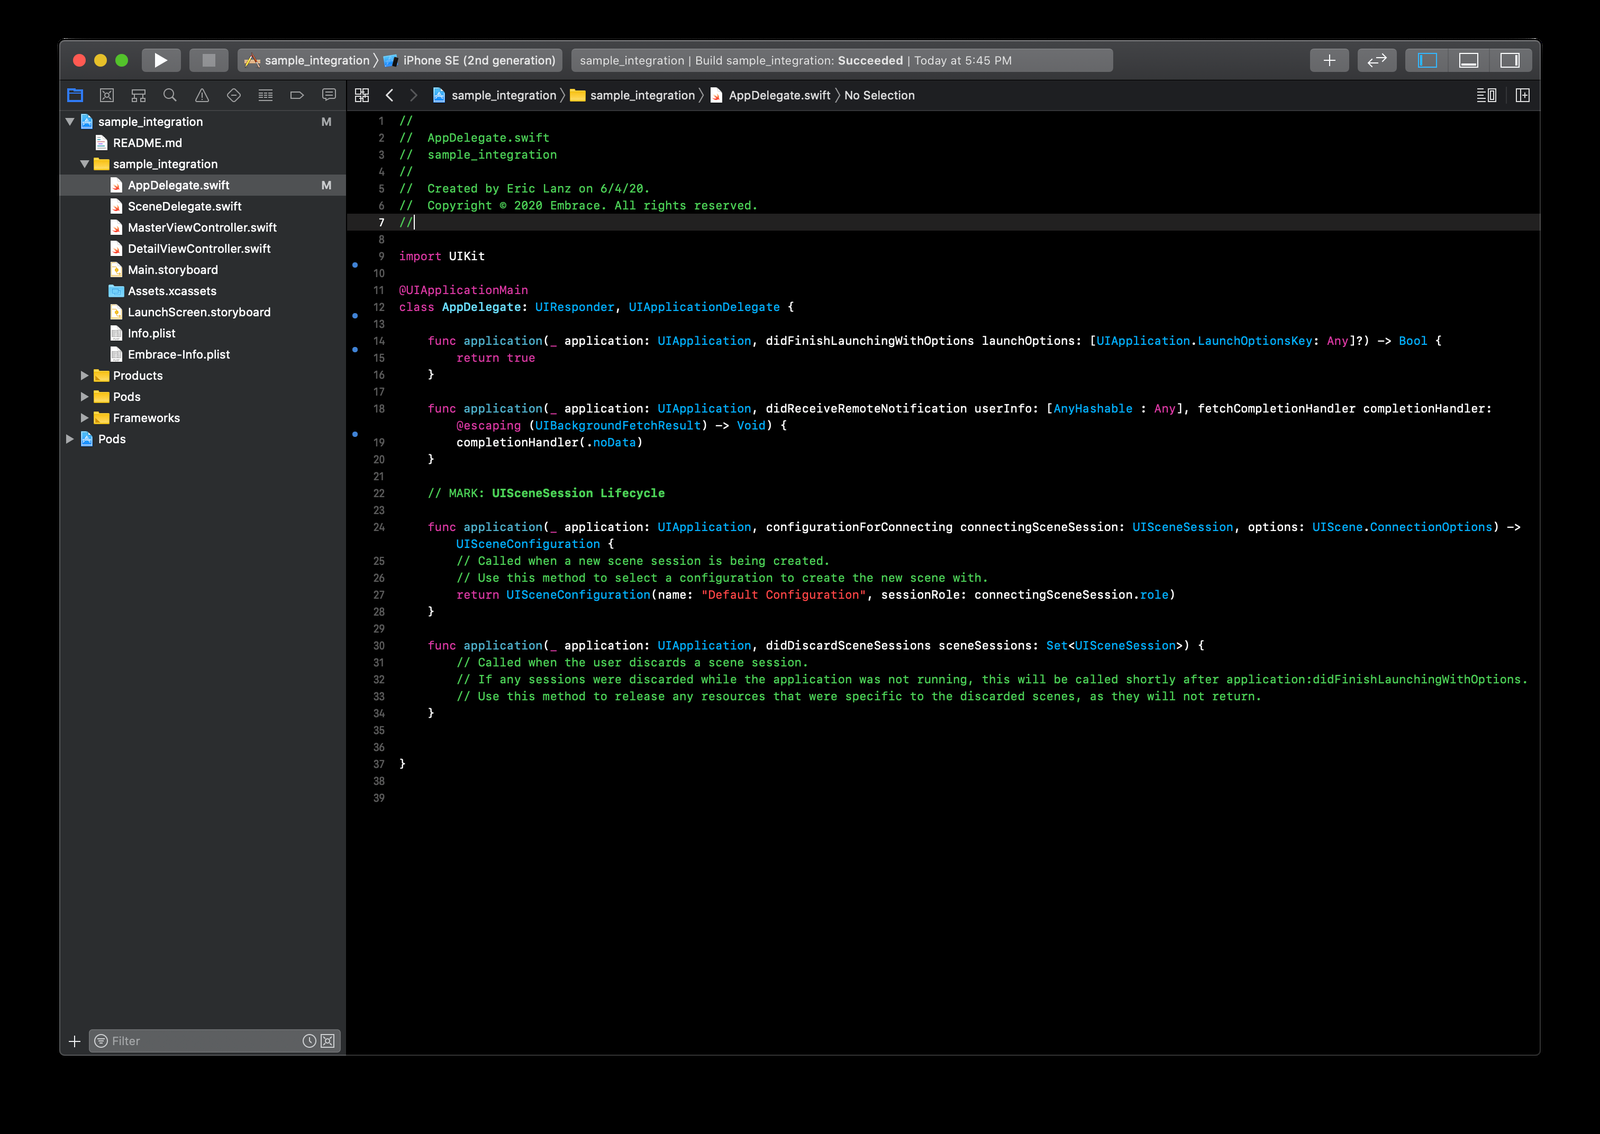
Let's start by importing the Embrace module. Open your program's
AppDelegate.swift class or equivalent.

At the top of the file where you see the other import statements, add one for Embrace.
- Swift
- Objective-C
import Embrace
#import <Embrace/Embrace.h>
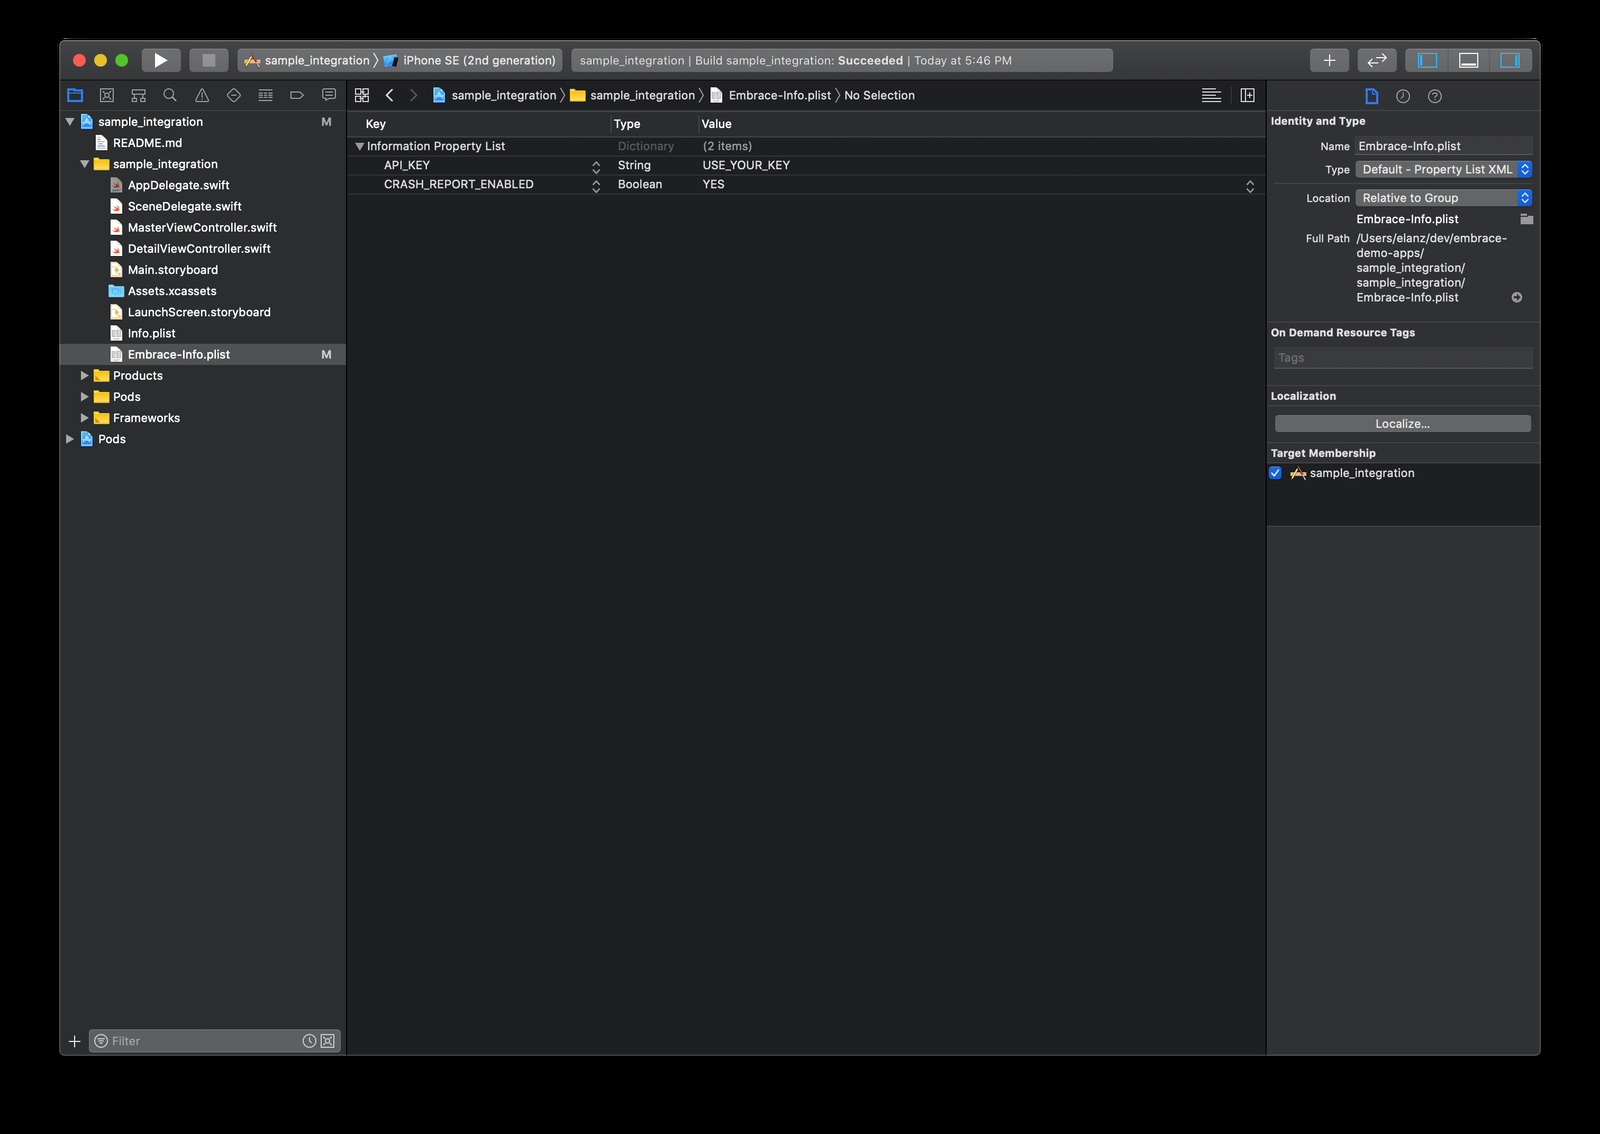
Now we're going to add a new file to our project. Embrace has many optional features and configuration options that you may want to use. It is best to start your integration with an Embrace configuration file so it's easy to add those options later.
Make a new file in the root of your project called Embrace-Info.plist and ensure
that it is included in your target.

For now, you can just add one entry to this file: "API_KEY". Be sure to fill in your real key from the Embrace Dashboard.
Make sure the target membership is checked for the Embrace-Info.plist file.
Add a start call
Next, inside your main startup function (usually ApplicationDidFinishLaunching) add the following code to start Embrace. Embrace does not perform any tracking or other actions until this call is made.
- Swift
- Objective-C
Embrace.sharedInstance().start(launchOptions: launchOptions);
Alternatively, if you do not want to keep your API_KEY in the plist file you can send it in programmatically using:
Embrace.sharedInstance().start(withKey: "API_KEY", launchOptions: launchOptions);
If you have a React Native project you have to add the framework
Embrace.sharedInstance().start(withKey: "API_KEY", launchOptions: launchOptions, framework:.reactNative);
[[Embrace sharedInstance] startWithLaunchOptions:launchOptions];
Alternatively, if you do not want to keep your API_KEY in the plist file you can send it in programmatically using:
[[Embrace sharedInstance] startWithKey:@"API_KEY" launchOptions:launchOptions];
If you have a React Native project you have to add the framework
[[Embrace sharedInstance] startWithKey:@"API_KEY" launchOptions:launchOptions framework:EMBAppFrameworkReactNative];
It is important that this call be made as early as possible in the lifecycle of your application to ensure we can collect the most data. Additionally, Embrace has taken great care to ensure we can operate alongside any other third party SDKs. If Embrace is initialized first, then our code can set things up to ensure that everyone can interoperate successfully in your application.
If you're running into issues trying to initialize the Embrace SDK, you can enable
the integration help mode by passing true to the enableIntegrationHelp property
when starting Embrace.
When this mode is enabled you'll see an alert with descriptive errors if Embrace
fails to initialize properly.
Please note that this alert will only show in development environments.
- Swift
- Objective-C
Embrace.sharedInstance().start(withKey: "API_KEY", launchOptions: launchOptions, framework: .native, enableIntegrationHelp: true)
[[Embrace sharedInstance] startWithKey:@"API_KEY" launchOptions:launchOptions framework:EMBAppFrameworkNative enableIntegrationHelp:YES];
If you are using Swift, you may want to also make this call after starting Embrace:
Embrace.sharedInstance().setCleanLogsEnabled(true);
This will tell Embrace to use Swift-style logging that will better match your existing logging.
End the Startup Moment
Finally, make sure to end the special "startup" moment that Embrace uses to track app launch performance. You can end this moment anywhere you choose. We recommend placing the call as close to the point that your UI is ready for use as possible, as doing so will give you the most accurate picture of the performance your users are experiencing with app launch.
- Swift
- Objective-C
Embrace.sharedInstance().endAppStartup();
[[Embrace sharedInstance] endAppStartup];
This moment is used to track launch performance, but also launch abandonment. This is the number of users who close the app before the launch finishes. To correctly track this it is critical that all code paths end the startup moment eventually. For example if your app can launch via a push notification, ensure that path also ends the startup moment or you may see false abandonment data.
You can learn more about moments and measuring performance yourself in the Moments section.
Build and Run Your Application
Alright, you're ready to build and run your application. Assuming the app launches correctly, pay attention to the system logging and look for Embrace to print out it's version number.
[Embrace] Embrace SDK enabled. Version: 5.25.1
If you encounter any errors, please get in touch on Slack and we can help you out.
If you see a log line like this, you've succeeded in integrating Embrace with your application. Let's trigger a session upload and verify this in the Dashboard.
Trigger a session upload
To trigger a session upload, simply send the application to the background by pressing the simulators 'home' button or swipe up, depending on the simulator you're running, or press Cmd+Shift+H on your keyboard. Typically the SDK will be given sufficient time to upload the session, but sometimes the app is not able to complete the upload in the background. To ensure the session was uploaded, launch the application again. Refresh the dashboard in your browser and you should now see that you've moved on to the next step.
Congratulations! At this point you've completed a basic integration of Embrace. Embrace is already collecting interesting data from your application. You can see this data by browsing around the timeline page for the session you just captured.